Month: August 2024

  • Post-Travel Skincare for When You’re Tired and Just Can’t

    While you’ve been busy traveling, relaxing, and having fun during this vacation season, your skin has faced a bit of a tough time. Exposure to different climates, time zones, pollution, sun, and flights can all wreak havoc on your complexion. Here are some super easy post-travel skincare tips for the ultimate lazy gal (or guy), so you can keep that vacation glow long after you’ve unpacked: 

    ALT Image: Collage of three images: a woman exfoliating, a jar of moisturizer, and bottles of water, representing a post-travel skincare routine for hydration and nourishment.

    1. Rehydrate from the Inside Out

    Long flights, climate changes, and the stress of busy schedules can leave your skin feeling dry and dehydrated. If you’re feeling lazy, do these to hydrate and revive your complexion:

    Drink Water: Start by drinking plenty of water to replenish lost moisture. Aim for at least eight glasses every day.

    Hydrating Foods: Add foods like cucumbers, watermelon, and leafy greens to your meals. These are high in water content and can help boost your skin’s hydration levels.

    Hydrating Mist: Keep a hydrating facial mist handy to refresh your skin throughout the day. Look for mists with rose water, aloe vera, or hyaluronic acid.

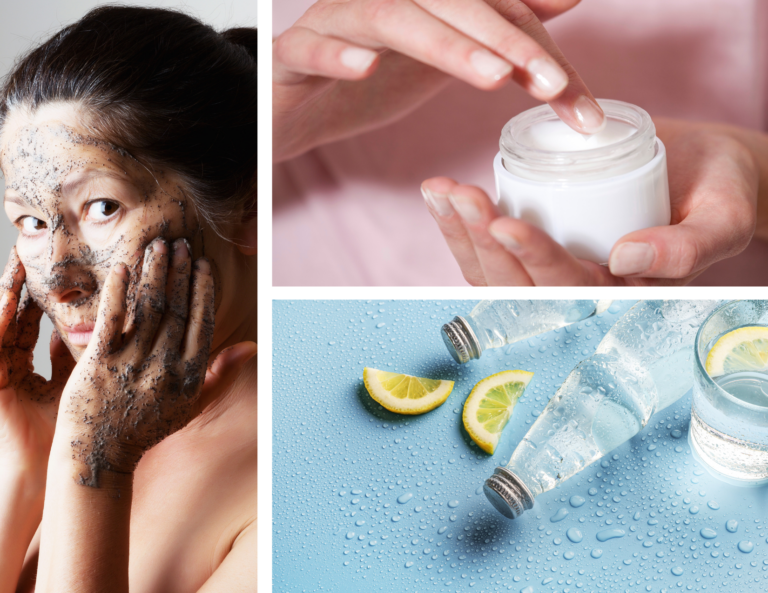
    2. Give Your Skin a Deep Clean

    After a trip, your skin likely has buildup from sunscreen, makeup, sweat, and pollution. A deep cleanse is essential to reset your skin so get up and do it!:

    Double Cleanse: Do a first cleanse to dissolve makeup and sunscreen, then cleanse again to remove any remaining impurities.

    Exfoliate: This is important to reveal fresh, radiant skin and to ensure your skincare products penetrate effectively. Use a mild exfoliant to slough off dead skin cells and promote cell turnover. If you don’t have any exfoliant, use a clay mask. No clay mask either? Gently massage your face with a damp washcloth and cream cleanser. 

    3. Replenish Moisture 

    Your skin may need some extra moisture after the drying effects of travel. Proper moisturizing will work wonders so if you manage to cleanse, take the extra minute and apply some hydration:

    Hydrating Serum: After cleansing and exfoliating, apply a hydrating serum with ingredients like hyaluronic acid or glycerin. These ingredients attract moisture to your skin, keeping it plump and hydrated.

    Nourishing Moisturizer: Lock in moisture with a rich, nourishing moisturizer. Look for one that contains ceramides, peptides, or natural oils to strengthen your skin barrier and protect against environmental stressors.

    4. Focus on Brightening

    Travel can leave your skin looking dull and uneven. Bring back your glow with a brightening treatment. If you really can’t with this step, skip it and do it tomorrow. But remember to sneak it in before moisturizing!

    Vitamin C: A vitamin C serum can brighten your complexion and reduce any dark spots or pigmentation caused by sun exposure.

    Eye Cream: Remember to treat your eyes. The delicate skin around your eyes can show fatigue after a trip. Use an eye cream with caffeine or peptides to reduce puffiness and dark circles.

    5. Protect Your Skin Moving Forward

    Once your skin is back on track, it’s important to protect it from future damage:

    Sunscreen: A must, even after your trip. Apply sunscreen with at least an SPF 30 daily to protect your skin from UV damage and prevent premature aging.

    Sleep: Aim for 7-8 hours of quality sleep each night to keep your skin looking fresh and radiant.

    Keeping your post-travel skincare routine simple and effective will help maintain your skin’s health and glow. By rehydrating, cleansing, and nourishing your skin, you’ll be able to undo the effects of travel and keep that radiant glow long after your vacation ends. So go ahead, travel beautifully, and know you can revive your skin when you return home. 

    But, if you really just can’t, feel free to book a facial with me 😉

  • Laniwai- A Disney Spa at Aulani: A Review

    This summer flew by, but one experience truly stood out: Laniwai- A Disney Spa at the Aulani Resort in Oahu. My family and I finally experienced Oahu Disney style, joined by seven of my closest friends and their families—25 people total (crazy, right?). It was an unforgettable trip, the kind my kids will talk about for years. Especially since we likely won’t be making a return visit anytime soon!

    Laniwai A Disney Spa sign at the Aulani Resort, displayed next to artwork

    The resort was amazing (obviously), but I’ll be honest- I’m not a die-hard Disney fanatic. I enjoy and appreciate the magic, but my life definitely does not revolve around Disney. That said, a few of my clients, both avid travelers and spa-goers, convinced me that the Laniwai Spa at Aulani is a must-visit, claiming it’s the best spa they’ve ever been to. Even though Aulani had already worked its Disney magic on my wallet (poof, money is gone!) I took their advice—and had no regrets.

    I booked my appointment two weeks before our stay and was pleasantly surprised to find availability on my preferred date. Their booking system was easy, and no deposit was required. I decided on the Wai Lomilomi-Pineapple Whip, a full-body exfoliation, and a massage. This seemed perfect for pampering my skin and muscles after days of pool and ocean adventures (tough life, I know).

    Hallway leading to the entrance of Laniwai featuring relaxing decor and ambient lighting.
    The gorgeous hallway leading to the spa. The spa entrance is on the left.

    First Impressions: Aulani Magic

    Laniwai Spa is tucked away in the Waianae Tower, a part of the resort I hadn’t explored yet since we were staying in the Ewa Tower on the opposite side. The soothing atmosphere immediately struck me as I stepped inside. The soft lighting and beautiful hardwood floors were gorgeous and, as a wannabe interior designer, I couldn’t help but grin from ear to ear. And this was just the hallway leading to the spa—I hadn’t even reached the main event yet!

    The reception area was equally beautiful and thoughtfully designed. The staff was attentive, guiding me to another team member who was holding a bowl filled with stones, each inscribed with a Hawaiian word. I was told to pick one, and I chose “pono”, which means “balance.” She explained that this word would be my focus during my time at the spa. I was then led through a dimly lit hallway to a small pool, where I was instructed to close my eyes, focus on my word, and gently place the stone in the water. This unique ritual truly set the tone for my experience, allowing me to fully immerse myself in the moment (which is why I didn’t take many pictures—sorry!)

    Hallway illuminated with a calming blue light, creating a serene atmosphere.
    Moody blue
    Stone pool at the Laniwai Spa at Aulani Disney Resort, featuring a natural wood wall panel and tranquil atmosphere.
    The stone pool

    Next, I was shown the locker room, restroom, sauna, and steam room—all impeccably clean and well-stocked. My only minor complaint was the lack of hair ties or headbands, as I forgot to bring something to hold my hair back. It did not take away from the experience, but it’s worth noting for future spa-goers.

    The Kula Wai: An Outdoor Hydrotherapy Garden

    Since arriving just over an hour before my appointment, there was plenty of time to enjoy all the amenities. I quickly changed and headed straight to Laniwai’s outdoor hydrotherapy garden- this feature was the unique selling point for me and it was everything I dreamed it would be. The garden is an oasis complete with soaking pools, rainfall showers, and a hot tub with massaging jets. There were two soaking pools each with different temperatures (hot and hotter) and I relaxed in both. Next to the pools, a small waterfall fountain added to the mesmerizing backdrop, but it didn’t distract me from trying everything this place had to offer.

    Lush, green foliage and walkway at Laniwai Spa at Aulani Disney Resort.
    The reflexology path is on the left of this walkway

    Taking the Plunge

    After the soaking pools, it was time for the cold plunge. As a first-time cold plunger, and hater of all things chilly, I appreciated the advice from a team member: plunge in quickly, get out, and then immediately dunk yourself in the warm jet spa. The cold plunge was surprisingly refreshing, but I don’t think I’ll need to do that ever again.

    Next up were the six rain-style showers. Since time was ticking and others were also using the showers, I couldn’t try them all, but I got the gist of it. 

    Then I walked on the reflexology path, designed to massage your feet, but I found it a little painful. To help soothe my minor aches, I decided it was time for a snack so I went to the lounge area

    Lounge at Laniwai Spa, Aulani Disney Resort, with lounge chairs, white privacy curtains, and a view of a serene fountain
    Lounge time

    Sustenance

    I walked into the bright & breezy lounge area where a snack table awaited with oatmeal raisin cookies (the chef’s specialty), coconut macarons, muffins, hot water, and an assortment of tea. There was also a mini fridge with bottled water. Everything was delicious-even the oatmeal raisin cookies!

    The snack table in the lounge area of Laniwai Spa at Aulani Disney resort

    The Treatment: 80 Minutes of Hawaiian Heaven

    After stuffing my face in the lounge, I waited for my therapist in the quiet room. The room had a row of massage chairs and I was lucky to have it all to myself. I settled into one, played around with the settings, and enjoyed my chair massage in silence.  

    My therapist greeted me in the quiet room and escorted me to the treatment room, which was as clean and gorgeous as expected. My treatment was the Wai Lomilomi-Pineapple Whip, a pineapple exfoliation followed by Laniwai’s signature Lomilomi massage. First up was the all-over body scrub which had the most intoxicating pineapple scent. Afterward, my therapist stepped out while I rinsed off the scrub in the shower, leaving my skin feeling incredibly smooth. Then came the Lomilomi- the most unique, deeply relaxing, and invigorating massage I’ve ever had. She checked in regularly to make sure the pressure was ok and that I was comfortable during the entire experience. My only complaint was that my 80 minutes would eventually have to end.

    Gift of bath salts from Spa Laniwai at Disney's Aulani Resort

    Final Thoughts: A Must For Spa Lovers

    When it was time to pay, I realized I had forgotten my wallet (fail), but the team member was accommodating and charged it to my hotel room (phew!). Then I was given a surprise treat- a complimentary sample pouch of bath salts labeled “Pono (balance),” my focus word of the day. This was a thoughtful touch, serving as a reminder to keep this intention in mind for the rest of the trip.

    Laniwai- A Disney Spa at Aulani  was an unforgettable experience and I left feeling refreshed, revitalized, and ready to enjoy the rest of my stay. If you’re not staying at the Aulani resort, you can still book a treatment. My booking confirmation email states, “If you are not staying overnight at the Aulani, A Disney Resort & Spa, four (4) hours of self-parking is included when you spend $50 or more at Laniwai.” That is plenty of time to enjoy the spa. 

    For those seeking a break from the excitement of Aulani (or parenting), Spa Laniwai provides the perfect balance of tranquility and luxury. It’s a must-visit for anyone needing to unwind and a beautiful way to immerse yourself in the spirit of aloha.

  • Waxing for Travel: Plan Ahead for a Smooth Trip

    Whether you’re beach-bound, exploring a new city, or going on an outdoorsy adventure, feeling confident & comfortable in your skin is key to a great trip. Stay smooth for up to 4 weeks, and save grooming time by scheduling an appointment and waxing before you travel.

    If you’re new to waxing, book a trial wax a few months before your trip to see how your skin reacts. This allows us to address issues like redness or bumps and gauge recovery time. Bonus, your next wax will be easier since the hair will grow in thinner & slower. Ensure at least 4 weeks of growth, or about a quarter-inch in length (think the width of your pinky finger), before your next session.

    Laptop resting on a bed, open to longweekendskin.com, with the page open for scheduling waxing for travel
    Remember to book your appointment!

    The Ideal Waxing Timeline: Plan Ahead 

    Timing is everything when it comes to waxing before travel, especially if you want to ensure your skin is at its best during your trip. Here’s a general guideline to help you schedule your appointment:

    2-3 Days Before Departure: The Sweet Spot

     – The best time to get waxed before a trip is 2-3 days before departure. This gives your skin time to recover. By the time you’re ready to travel, any potential discomfort will have subsided.

    **Remember: avoid using shared swimming facilities after getting waxed. Open pores make you more susceptible to infections, so it’s best to wait at least 24 hours before hopping into pools, hot tubs, and the like. So again, PLAN AHEAD!

    1 Week Before Departure: For Sensitive Skin

     – If you have sensitive skin or are prone to irritation, schedule your appointment about a week before your trip. This gives your skin extra time to heal so you’re not dealing with any lingering redness when you’re on the go.

    The Day Before: For Last-Minute Planners

      – If you can score a last-minute appointment the day before your trip, be mindful that your skin may be more sensitive, so pack a soothing post-waxing cream or aloe vera gel to calm any irritation. Avoid shared swimming facilities on the day of your wax and the day after to prevent infection. 

    Prep Your Skin

    To ensure the best results from your waxing session, prepare your skin in advance. Before your appointment:

     – Moisturize. Keep your skin hydrated in the days leading up to your wax, but do not apply heavy lotions or oils on the day of your appointment.

    – Gently exfoliate your skin 24-48 hours before your appointment to remove dead skin cells and prevent ingrown hairs.

    – Avoid sun exposure or tanning at least 24 hours before your waxing session, as sunburned skin can be more sensitive. 

    Post-Wax Care: Keeping Your Skin Smooth During Your Trip

    After your wax, it’s crucial to care for your skin properly. Here’s what to do:

    – Stay Cool: Avoid hot baths & showers, saunas, and direct sun exposure for at least 24 hours after waxing to prevent irritation and heat-induced inflammation.

    – No sweating: Skip the gym, exercise, or anything else that makes you sweat. Excessive sweating can raise the risk of infection or irritation after waxing when pores are open.

    – Pack Smart: Bring along travel-sized post-waxing products, such as soothing creams, aloe vera gel, or Neosporin to help with healing.

    – Exfoliate Gently: Wait a few days after your wax, but continue to exfoliate every few days while traveling to prevent ingrown hairs, especially if you’re in a warm, humid climate.

    Planning and scheduling a wax before travel is easy. Follow these tips to keep your skin smooth and ready for any adventure. So go ahead, book that appointment, and travel beautifully!